5-6 Set Arduino & Raspberry Pi

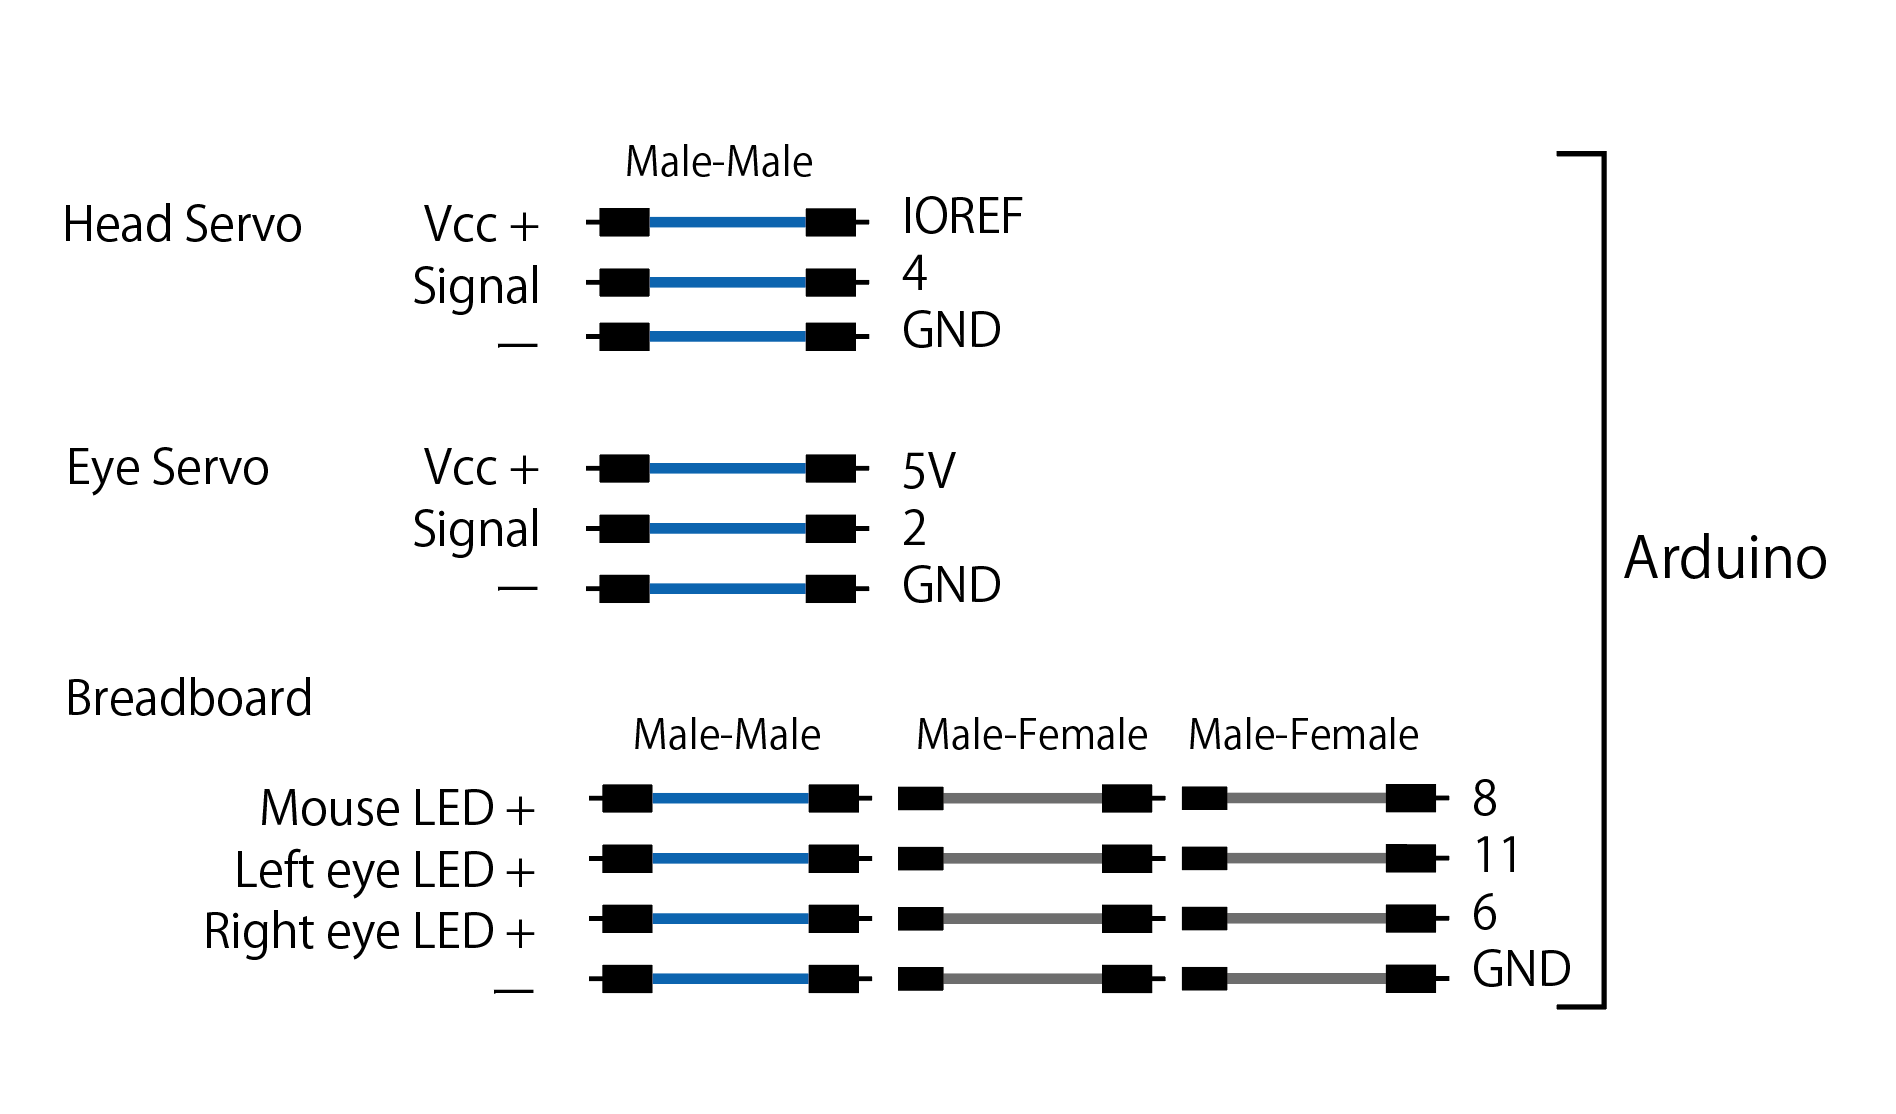
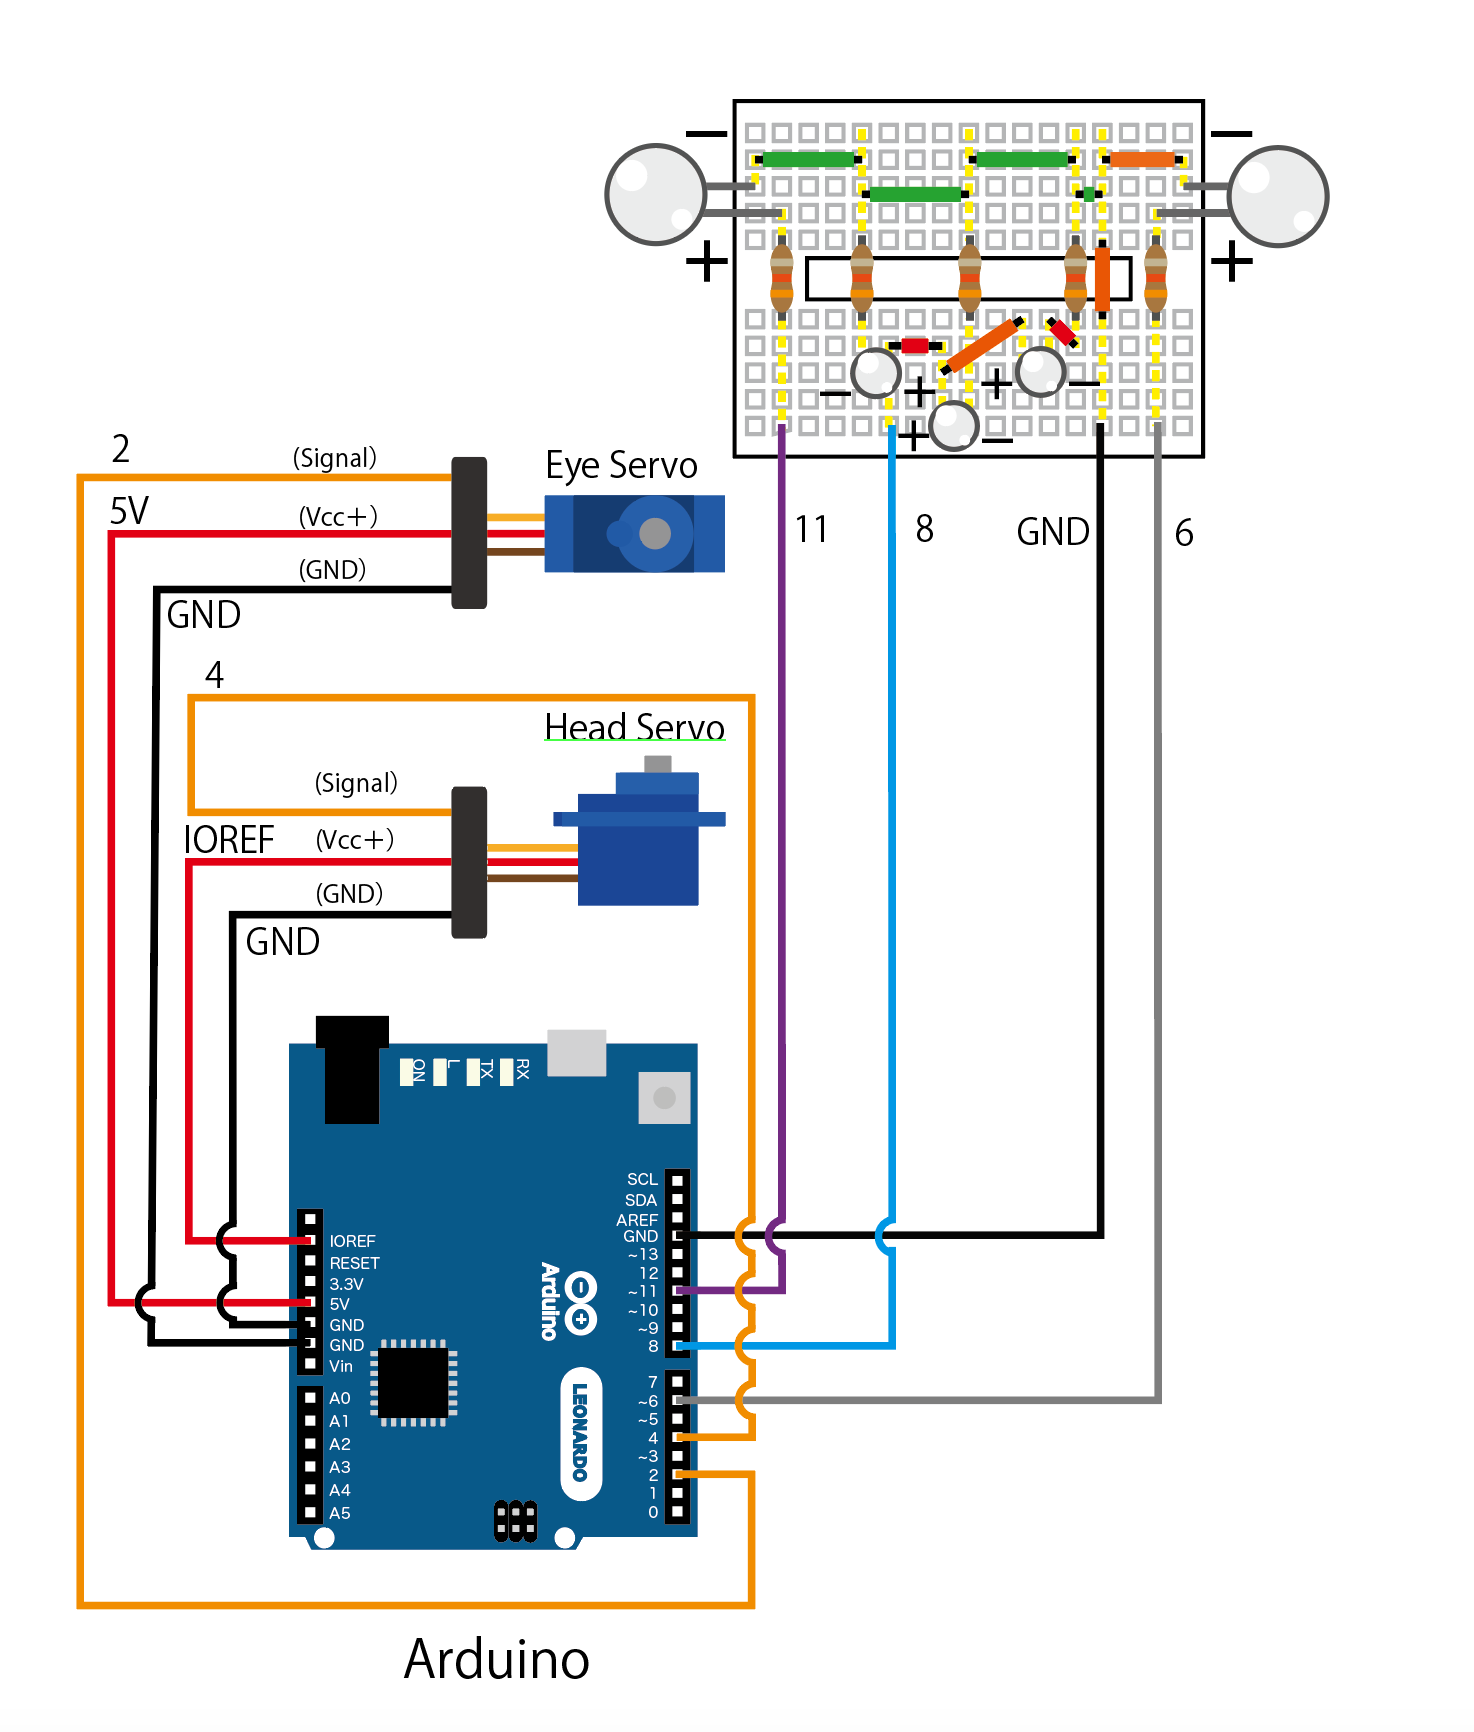
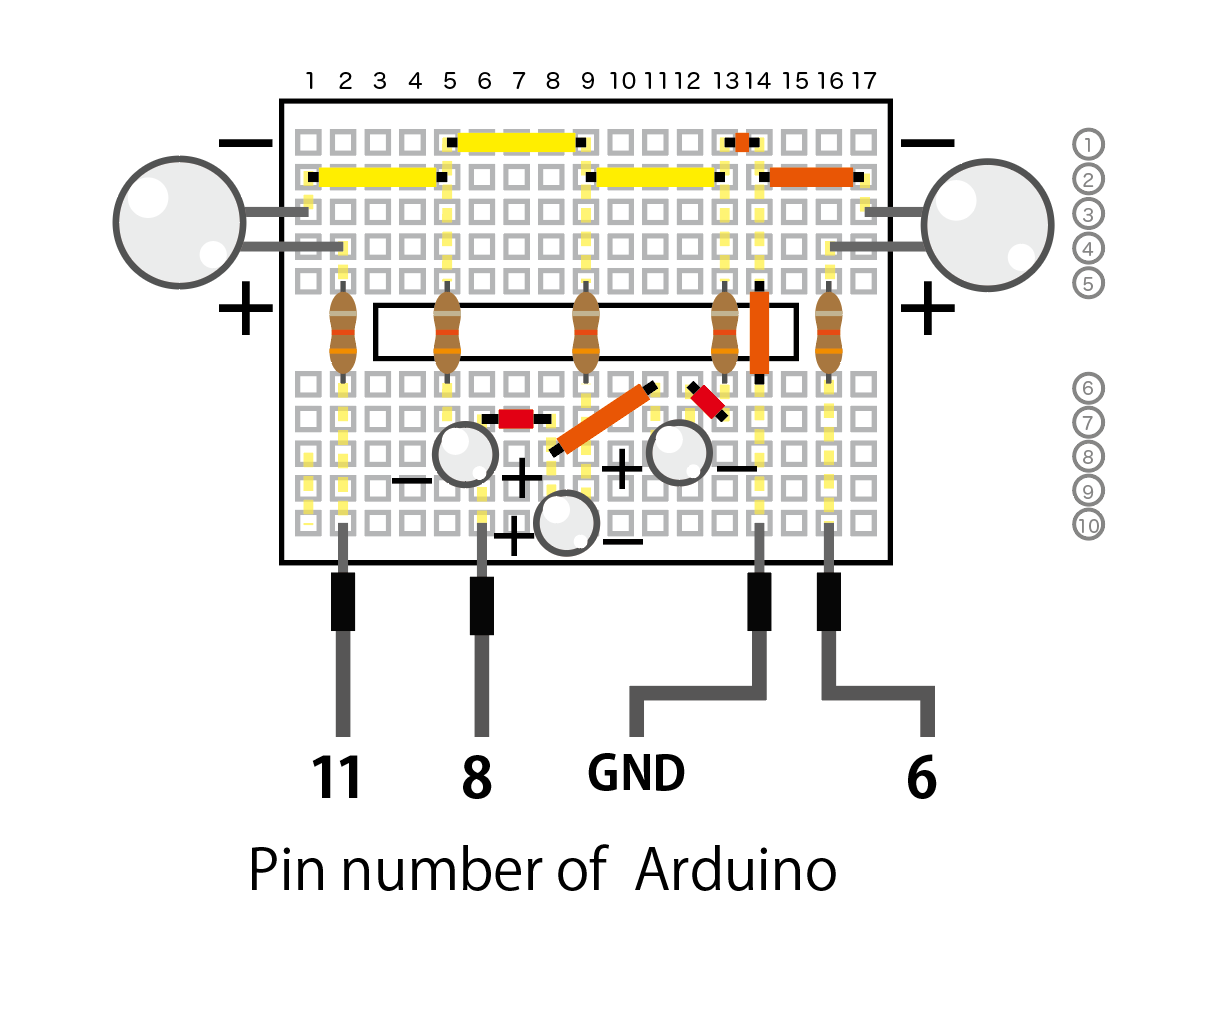
5-6-1 Line the jump wires
スクリーンショット 2016-08-21 22.43.35

5-6-2 Set Arduino on the bread board after install program
写真7-83 Arduinoを取り付ける


5-6-3 Expand 2 “M3” holes to Raspberry Pi
写真7-84 Raspberry Piの穴を二カ所広げる


5-6-4 Set Raspberry Pi to the left on the bread board after set programmed micro SD card
写真7-85 Raspberry Piを取り付ける


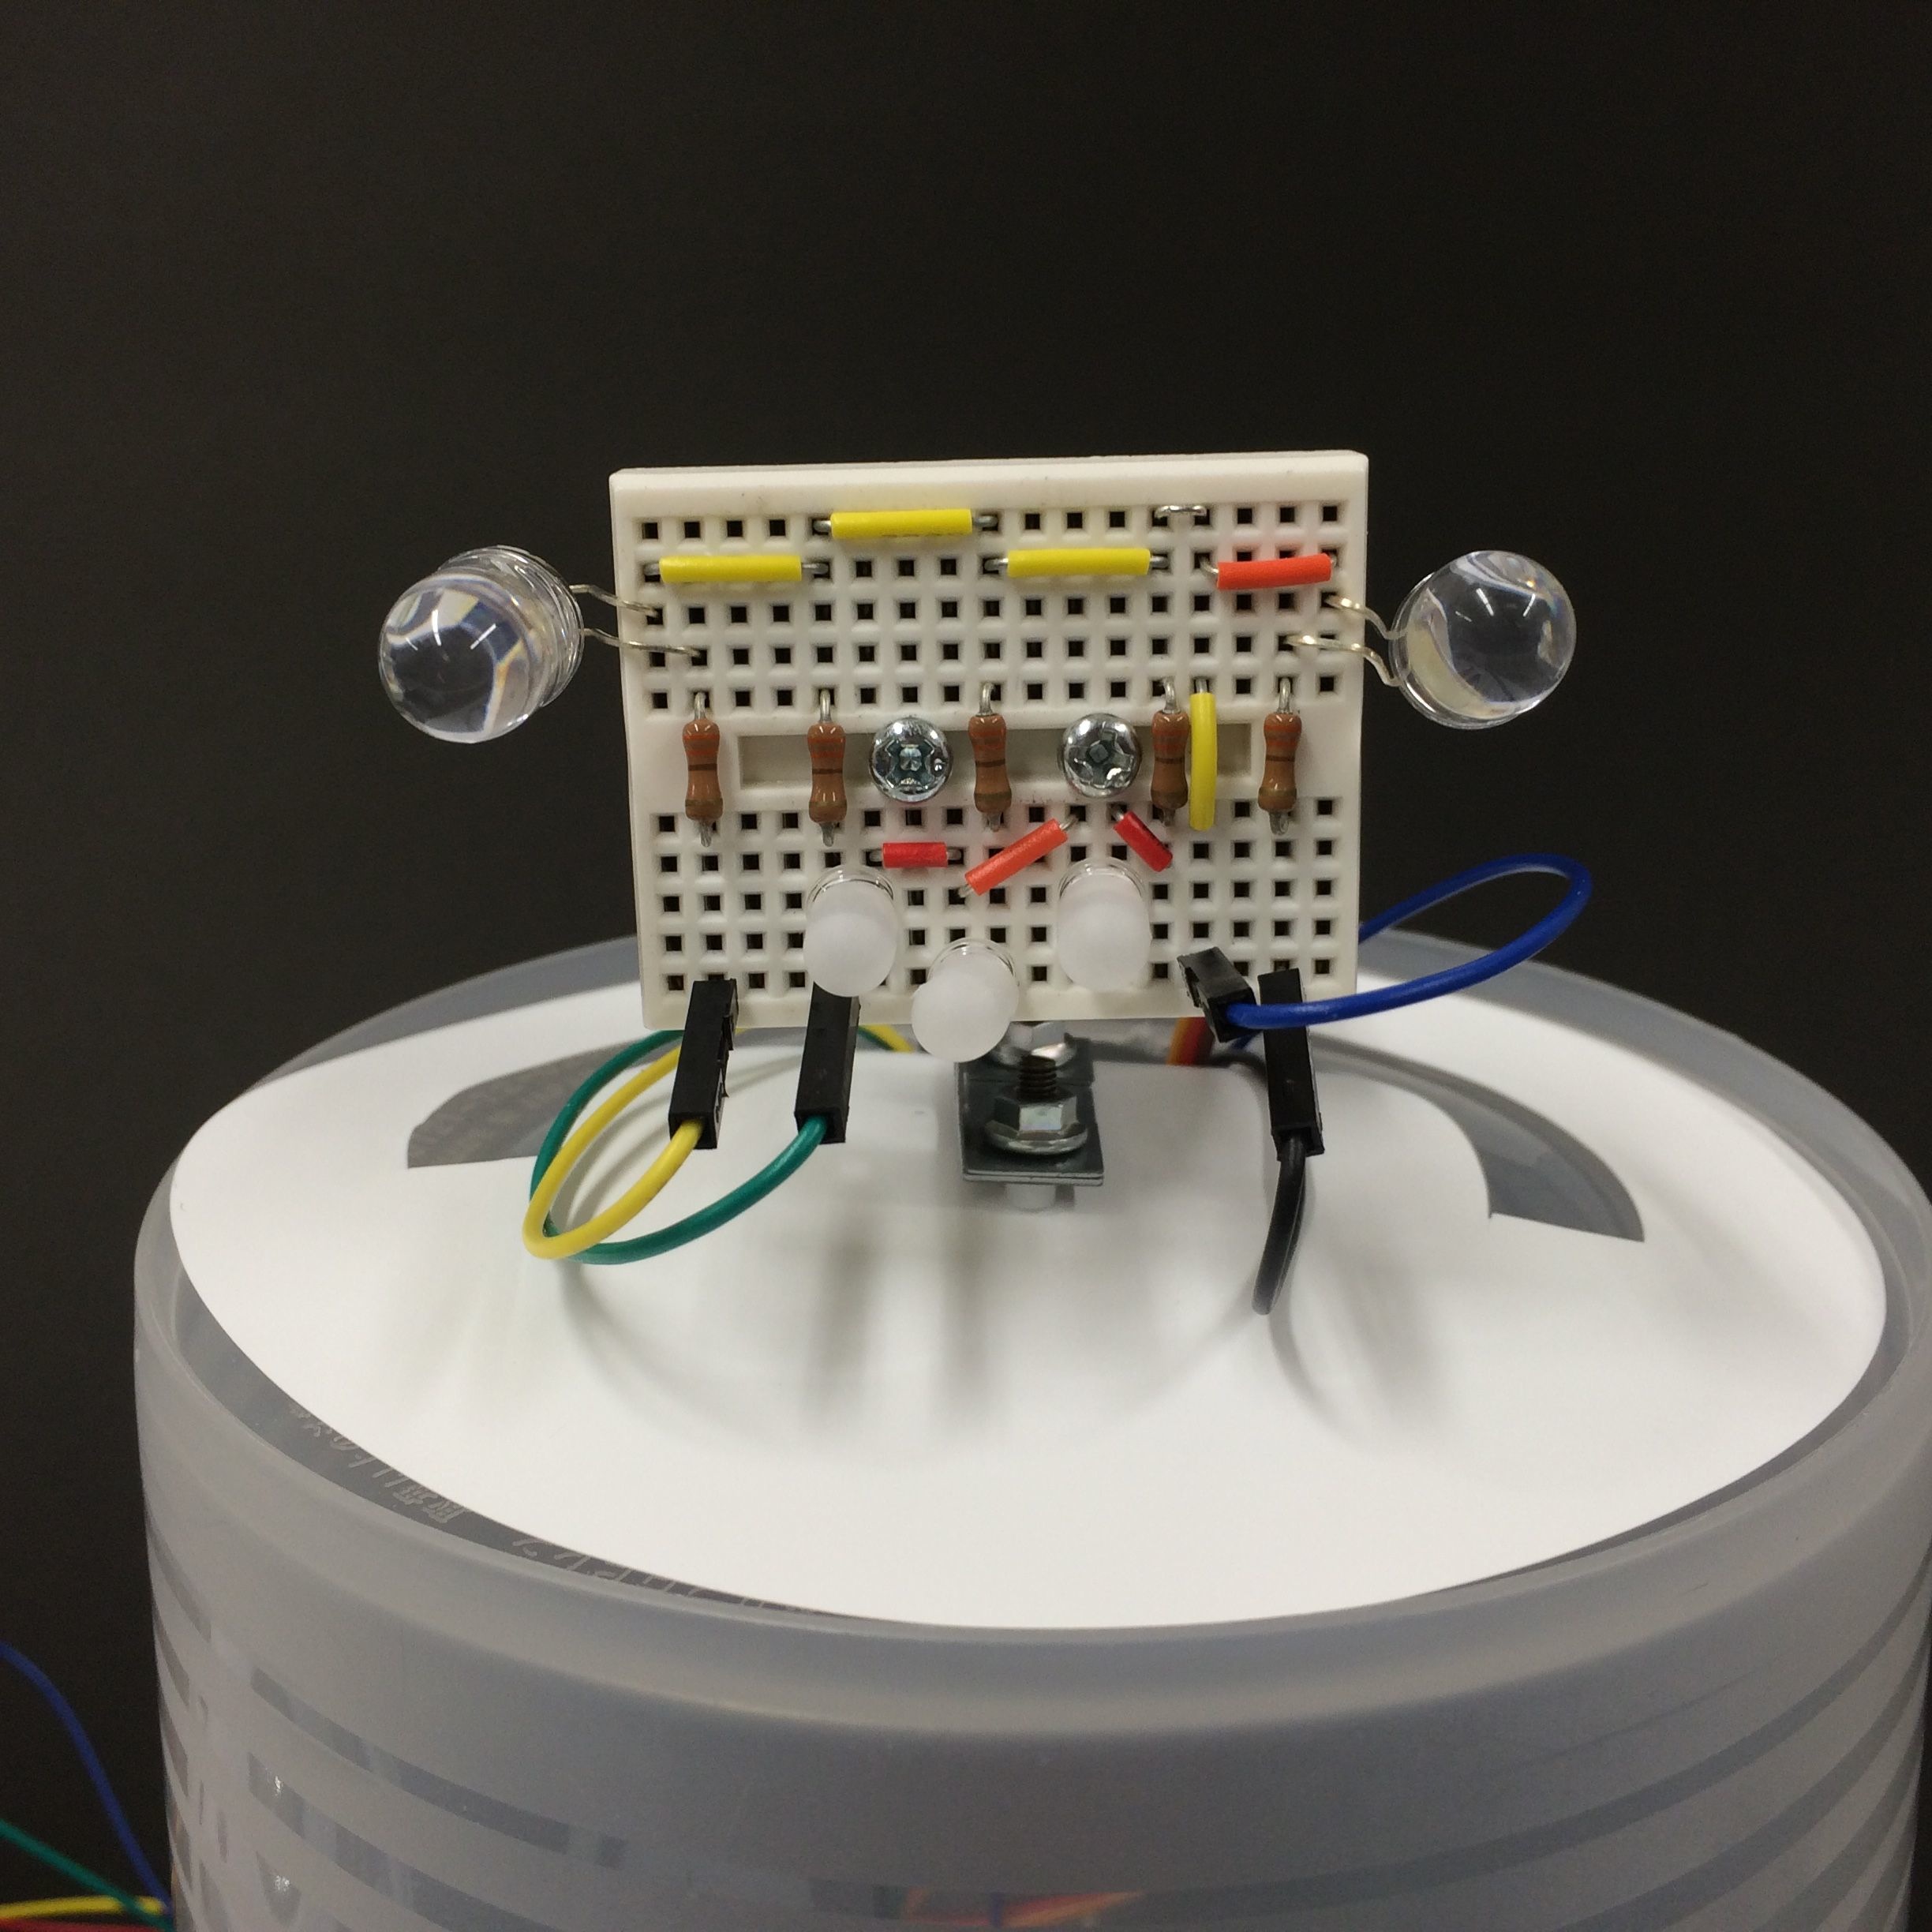
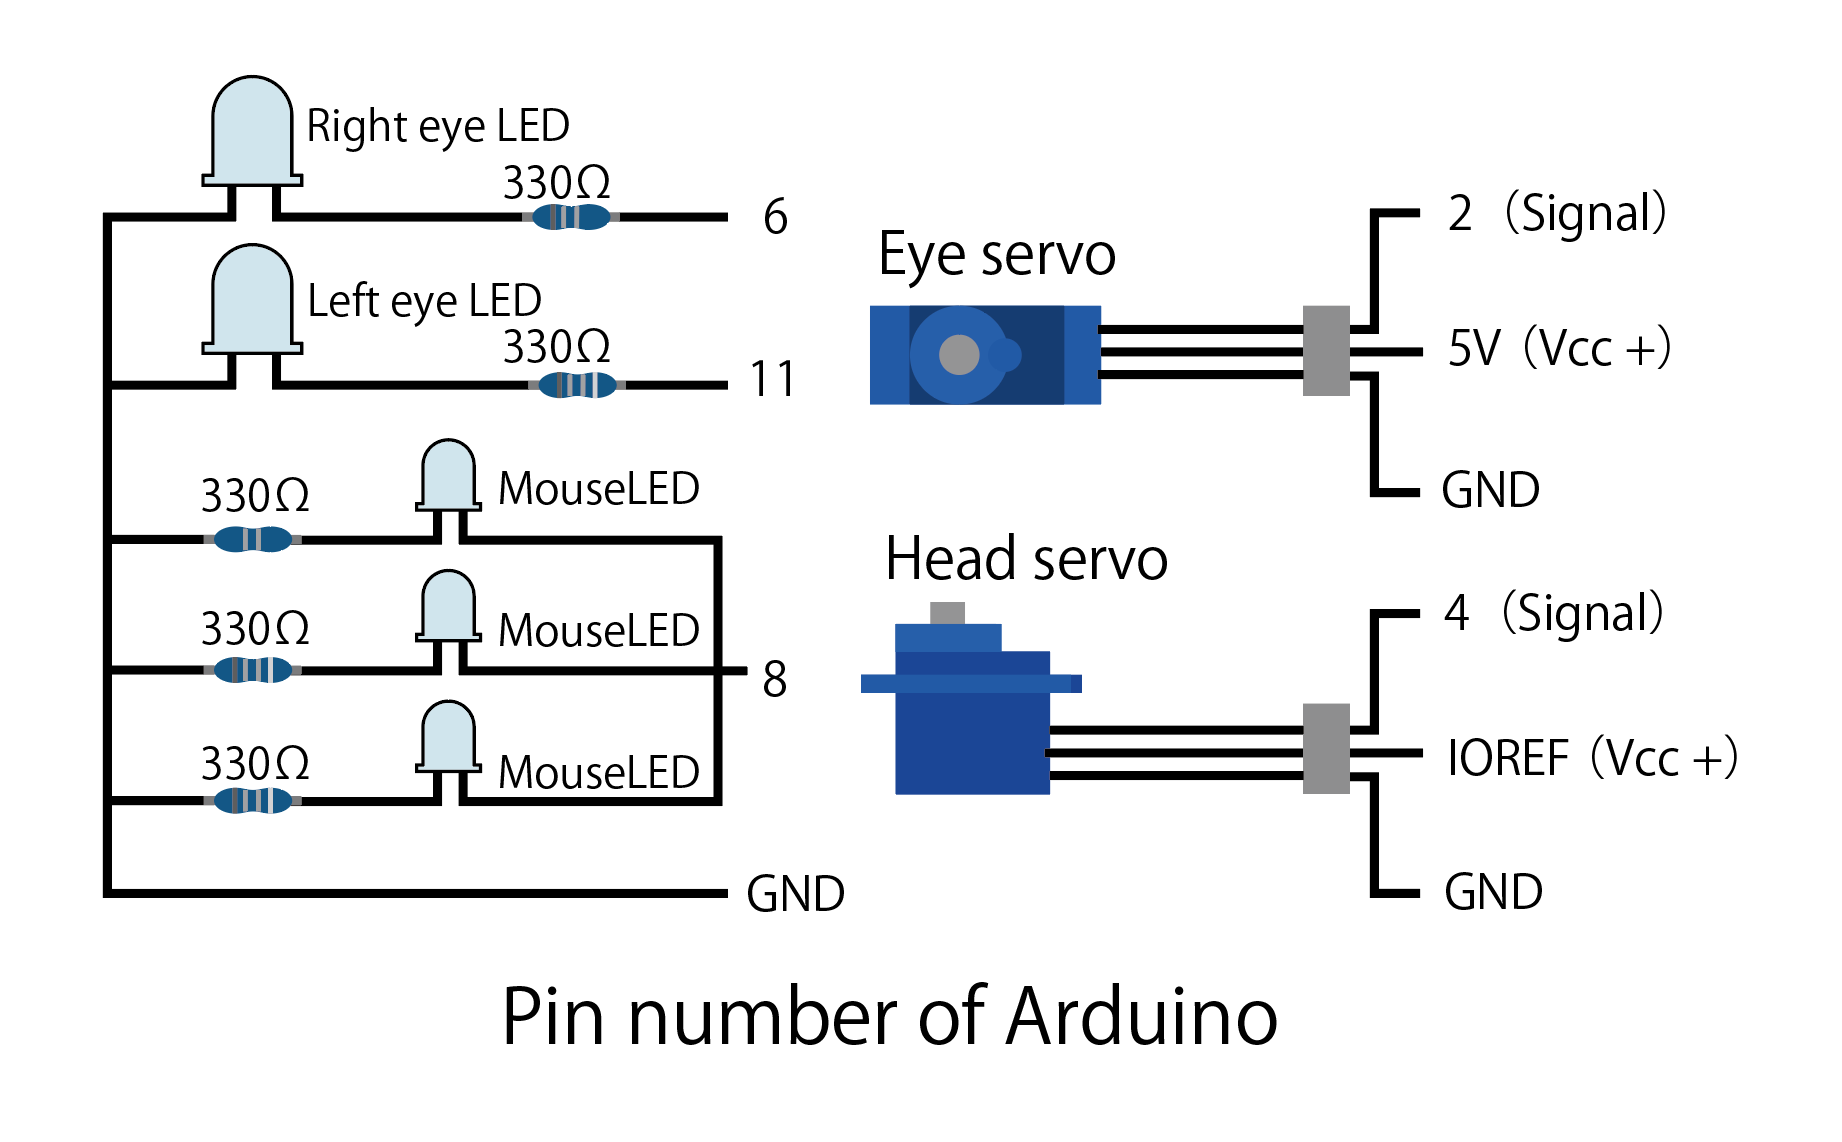
5-6-5 Connect the jump wires to LED, the Registers, servo motors
スクリーンショット 2016-08-21 22.55.32


スクリーンショット 2016-08-17 11.27.48


スクリーンショット 2016-08-21 22.32.08


写真7-86 配線したArduin


5-6-
写真7-87配線したブレッドボード