
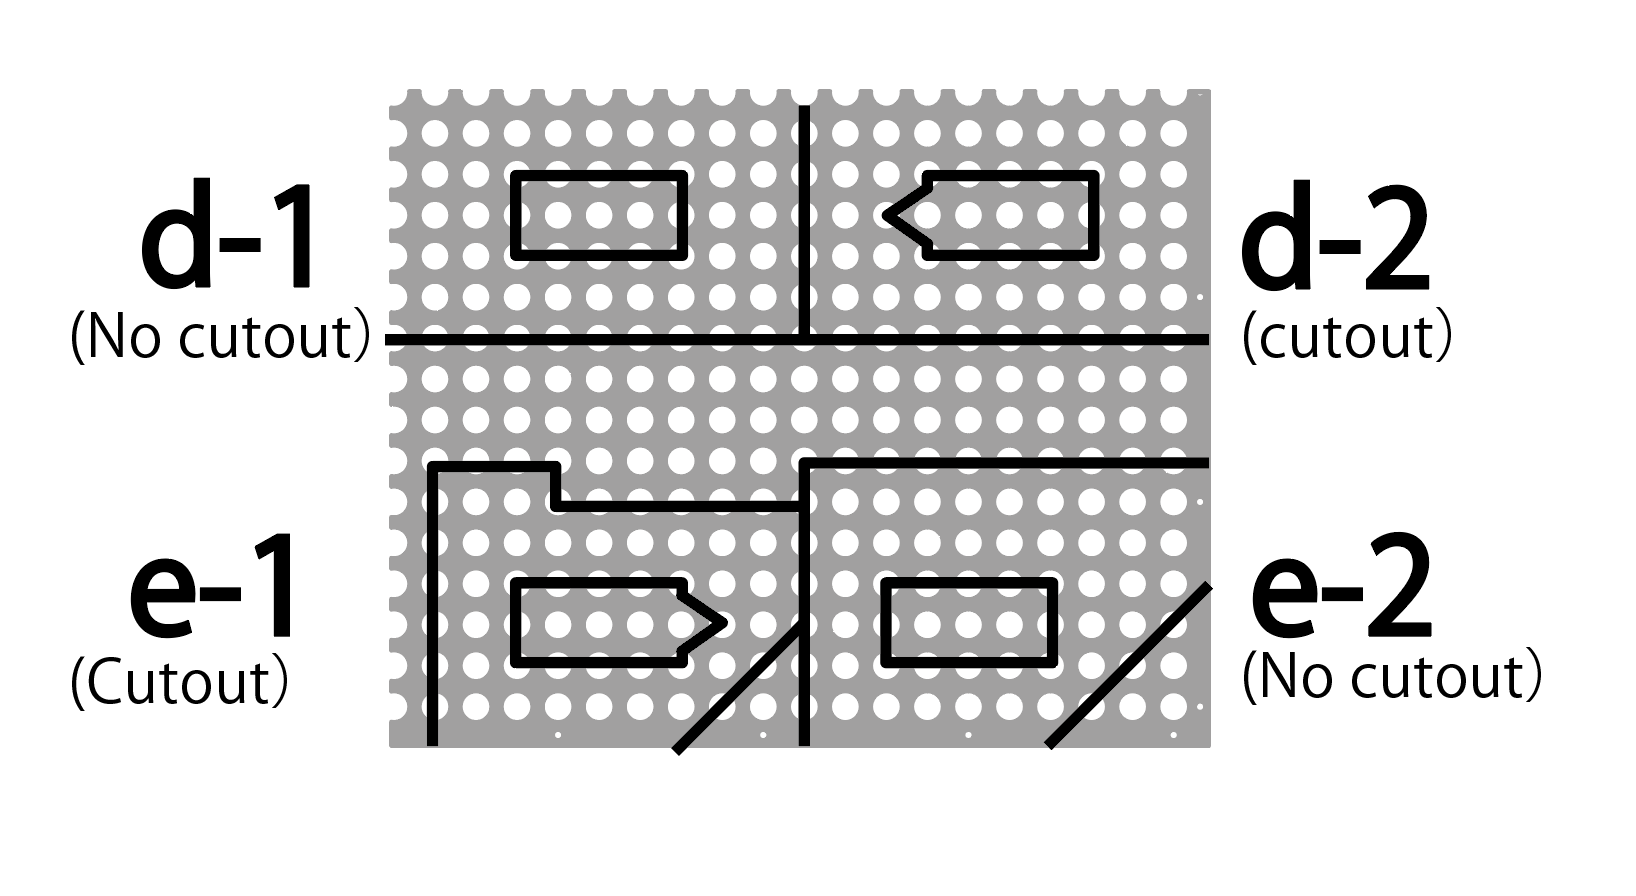
5-3-1 Cut Universal Plate “C” and divide int 4 “d-1″,”d-2″,”e-1″,”e-2”

5-3-2 Check orientation of boby part

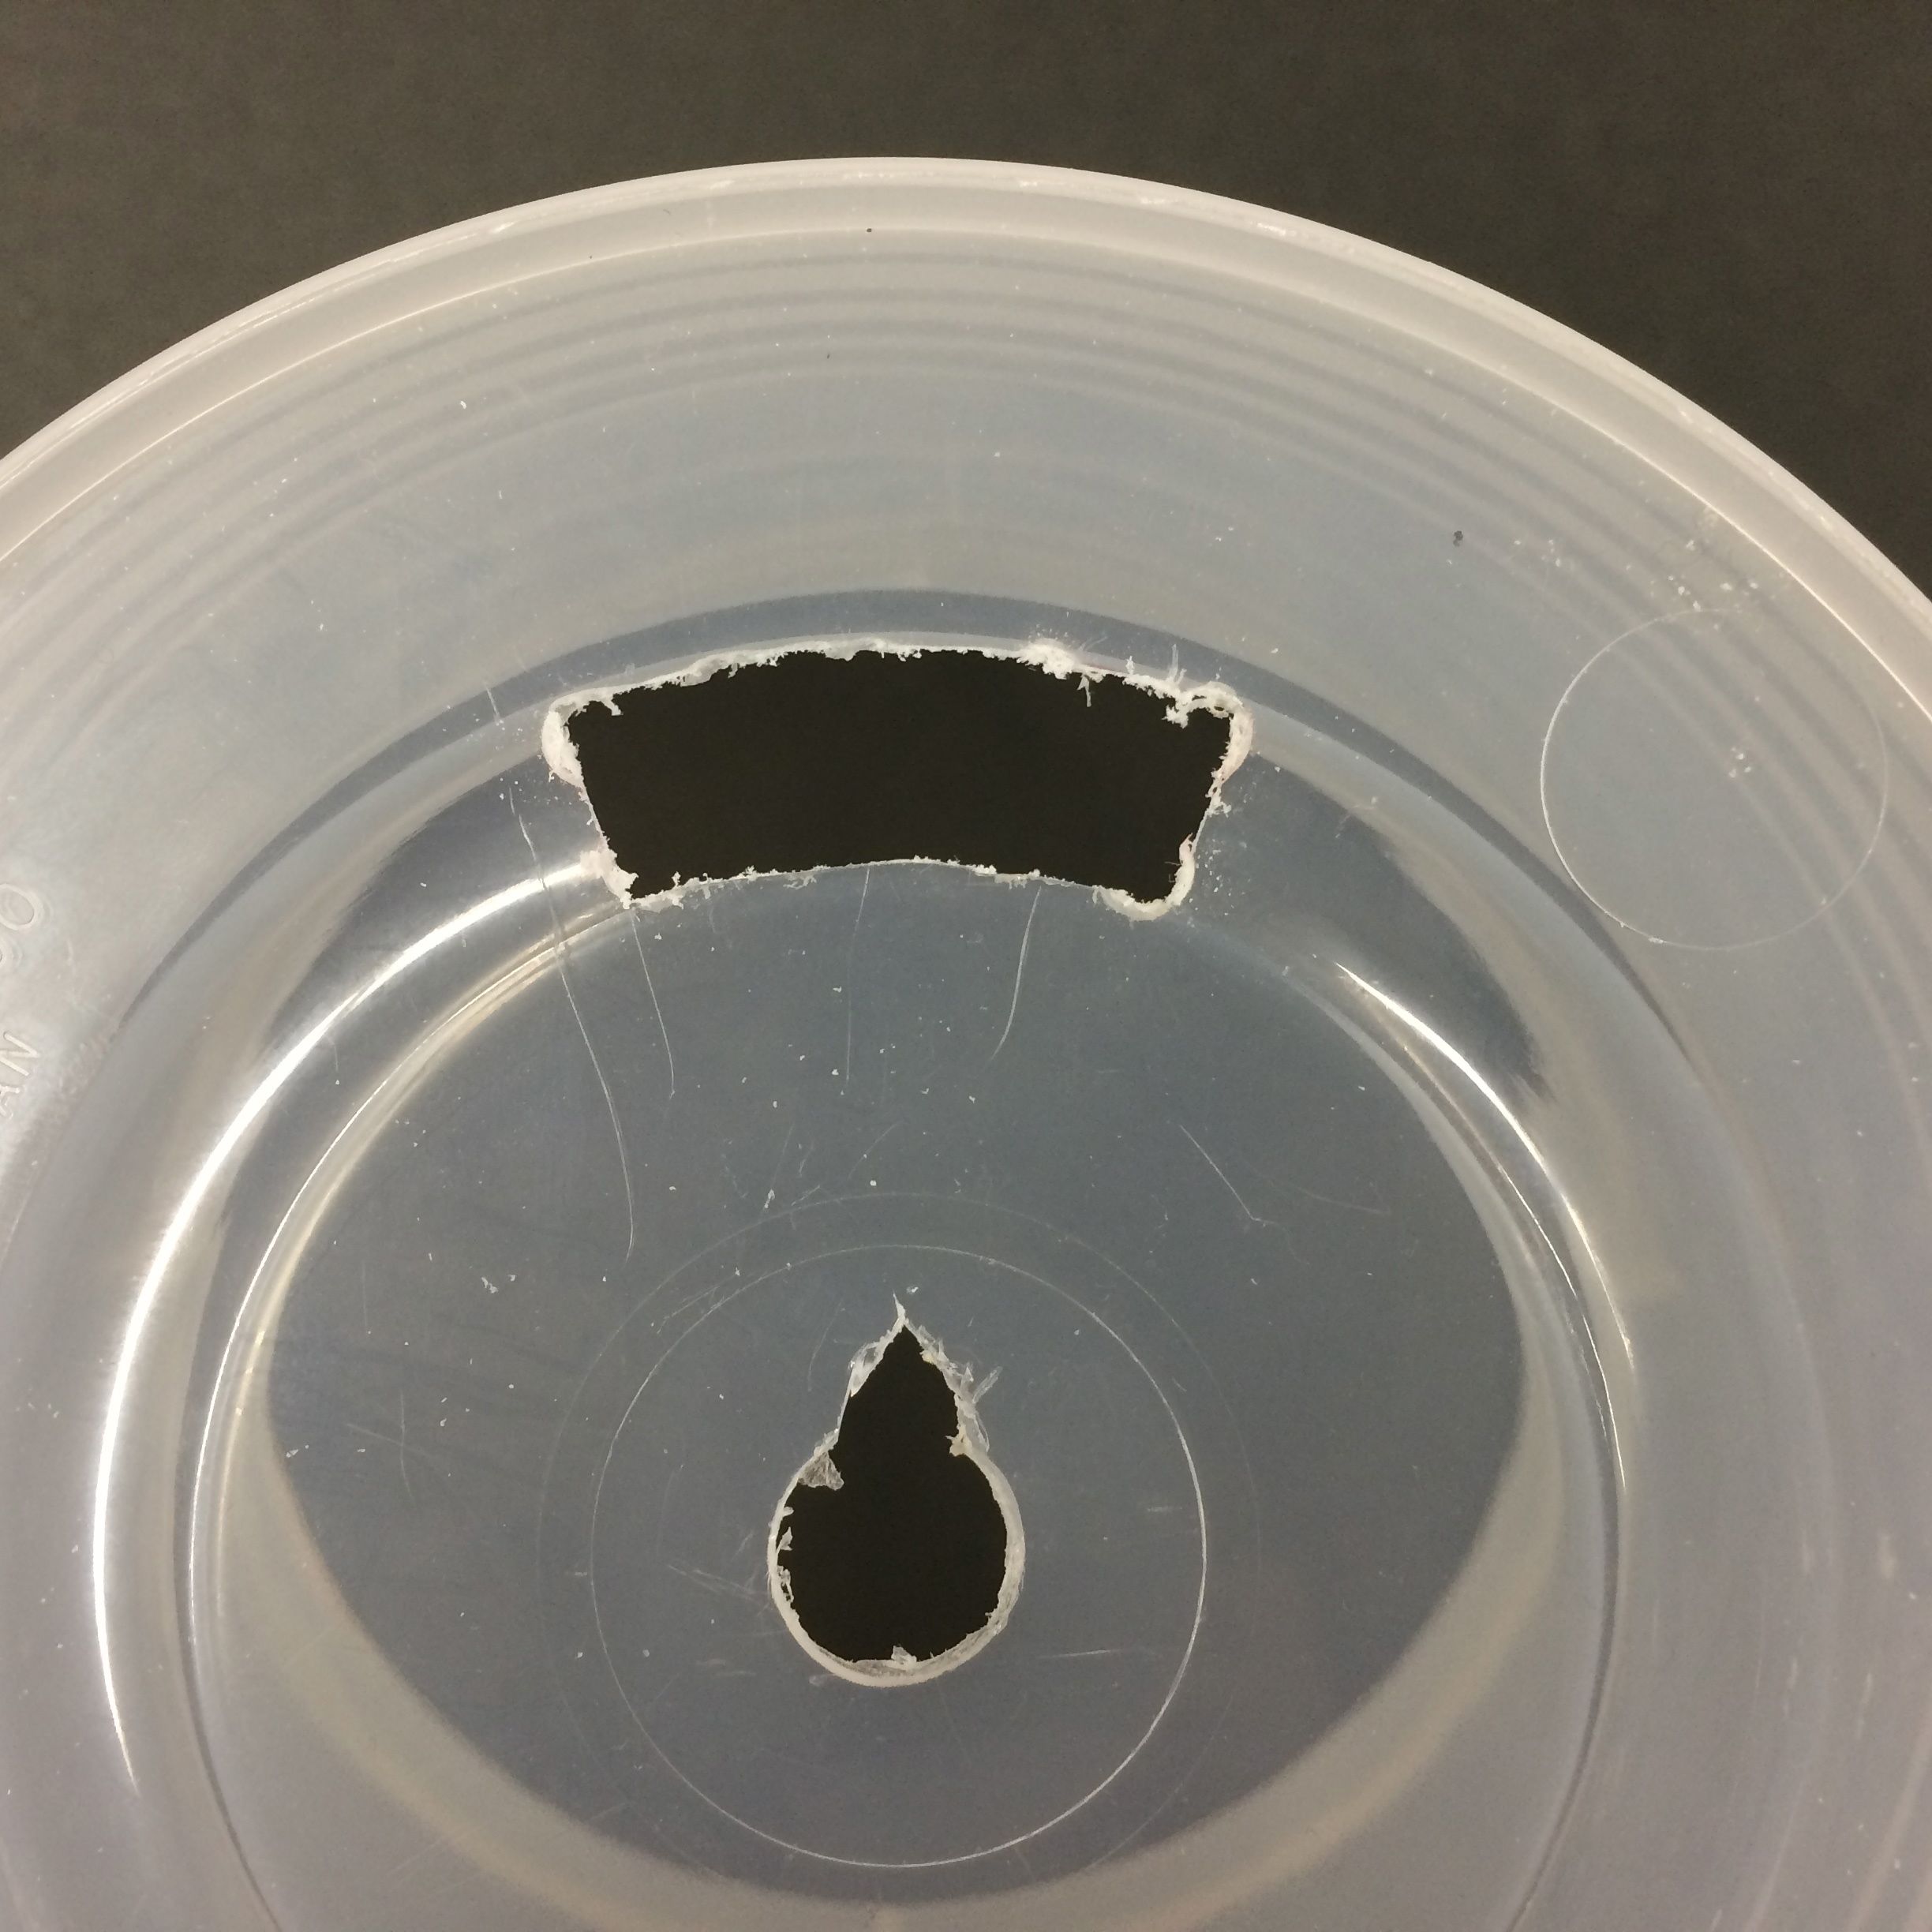
5-3-3 Use templates “template for body ” and mark the hole for cable and servo motor

5-3-4 Drill the hole and sand for servo motor

5-3-5 Drill the hole and sand for cable
5-3-6 Drill 2 holes and set servo
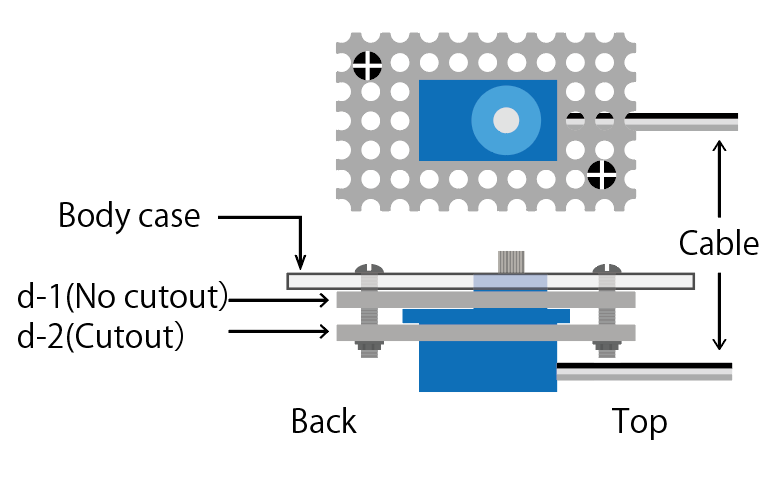
5-3-7 Tack “d-1″,”d-2” and Servo motor at the body by Sellotape

5-3-8 Drill 1 hole with “d-1″,”d-2” and Servo motor

5-3-9 After drill one hole and screw, drill other one and screw
